Create and manage storage accounts, resource groups, and locations
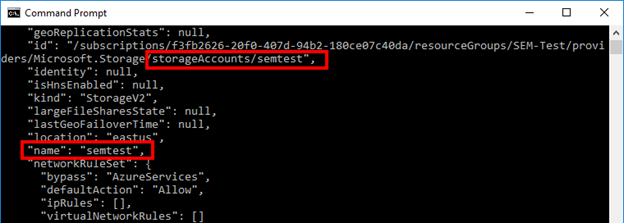
If you have a storage account, run the following command in the Azure CLI to display the account.
az storage account listIf a storage account does not exist, create a new account.
The resource group name and location are in the JSON output. For details about listing the storage account in the command line, see az storage account on the Microsoft Learn website (© Microsoft Corporation, available at learn.microsoft.com, retrieved March 20, 2023).
To access the Azure Portal, click Portal in the upper right of the Microsoft Azure page.

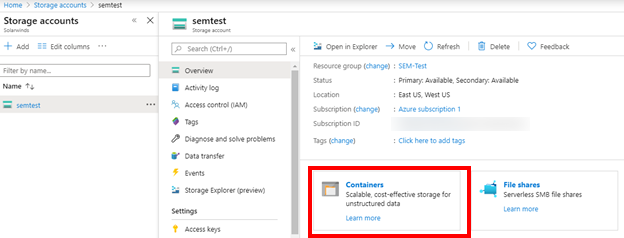
Storage accounts, locations, and resource groups are also available in the Azure Portal under Home > Storage accounts.

The storage account name, location, and resource group names are required to run additional commands. Create and maintain a list for later use.
Create a storage account in the Azure Portal
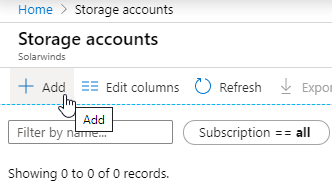
- On the Azure Portal Home page, click Storage accounts.
- On the Storage accounts toolbar, click Add.
- Under Project details, select your Subscription and Resource group from the drop-down lists.
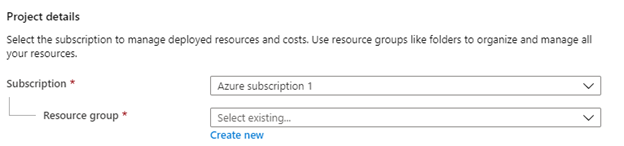
- If you do not have a resource group, click Create new.
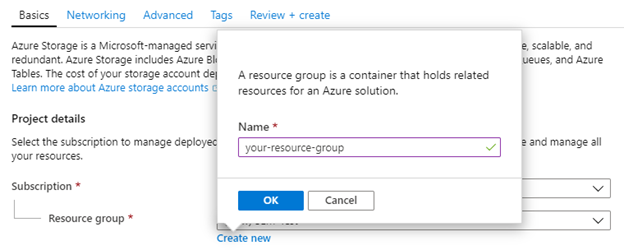
- Enter a name for the resource group. Record and save the name in a safe place.
- Click OK.
-
Under Instance details, enter a name for the storage account. Record and save the name in a safe place.
When you create a name, ensure that the name:
-
Includes between 3 and 24 characters.
-
Includes numbers and lowercase letters.
-
Does not currently exist in Azure.

-
- Select a location, or use the default location. Record and save the location name in a safe place.
- Accept the default values for the remaining fields.
- Click Review + create to review your settings, and then click Create.

- To verify the storage account, open a command prompt and run the following command:
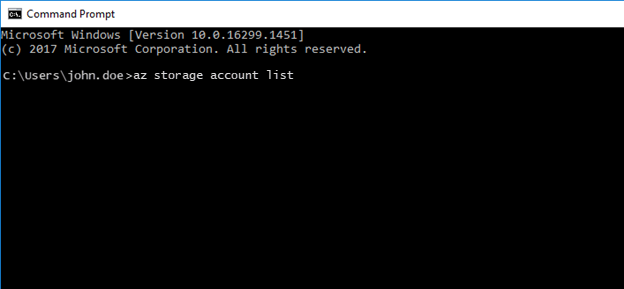
where
john.doeis your username. - Scroll down and locate the name of your new storage account.
Record the names of your storage account and resource group, as well as the location. You will need them later.
- Now that you have a storage account and resource group, create a container. The container holds your uploaded VHD files.
- On the Azure Portal Home page, click Storage accounts.
- Select your storage account, and then click Containers.
- On the Containers toolbar, click + Container.
- Enter a name for your container. Record and save the name in a safe place.
- Click OK.